Master Your Tools: How Does a Bench Vise Work?
If you’ve ever stepped into a workshop, you’ve probably noticed that sturdy metal contraption bolted to the edge of a workbench. That’s a bench vise, and it’s one of those tools that seems simple on the surface but actually has some pretty clever engineering going on beneath it. Whether you’re a seasoned woodworker, a metalworker, or someone just getting started with DIY projects, understanding how a bench vise works can transform the way you approach your craft.
Think of a bench vise as the third hand you’ve always wished you had. You know that feeling when you’re trying to hold something steady while working on it, and your hands just aren’t enough? That’s exactly what this tool solves. But there’s more to it than just clamping something down. The mechanics behind it, the different types available, and the proper techniques for using one—these are all things that can make a real difference in your projects and your safety.
Understanding the Basics: What Exactly Is a Bench Vise?
A bench vise is essentially a mechanical clamping device that holds workpieces firmly in place while you work on them. It’s like giving your project a bear hug that won’t let go until you decide to release it. The beauty of this tool lies in its simplicity and effectiveness. When you’re filing, sawing, drilling, or shaping something, you need both your hands free to operate your tools safely. A bench vise handles the holding part, leaving you fully equipped to focus on the actual work.
The primary purpose of a bench vise is to provide stability and control. Imagine trying to file a piece of metal that’s just sitting loosely in your hand—it’s not going to work well, and it’s definitely not safe. Now imagine that same piece of metal locked firmly in a vise. You can apply consistent pressure, achieve better results, and do it all without worrying that your workpiece is going to slip or move unexpectedly.
The Essential Components That Make It Work
Let’s break down the anatomy of a bench vise so you understand what each part does. Every bench vise, regardless of its specific style, has a few key components that work together to create that powerful grip.
The fixed jaw is stationary and doesn’t move. It’s bolted permanently to the bench vise body and serves as one side of the clamping surface. The movable jaw is the opposite—it slides back and forth, closing in on the fixed jaw to trap your workpiece between them. These two jaws are what actually grip whatever you’re working on.
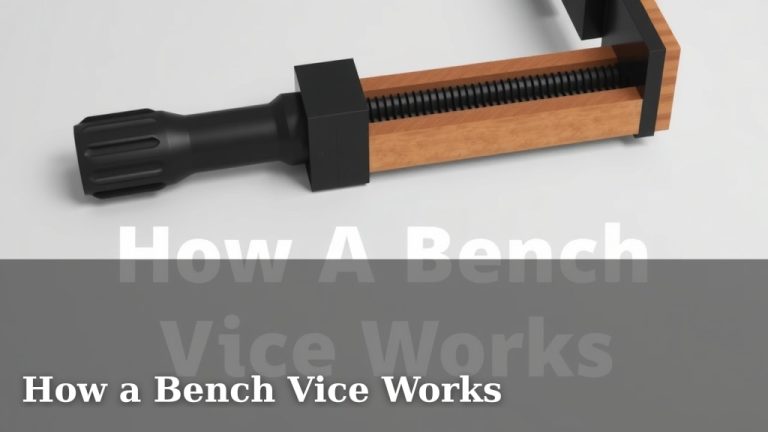
Then there’s the screw mechanism, which is really where all the power comes from. This is typically a threaded screw that runs perpendicular to the jaws. When you turn the handle attached to this screw, it either tightens or loosens the movable jaw. The handle itself is usually long enough to give you good leverage—the longer it is, the less effort you need to apply to generate clamping force.
The base or body of the vise is the solid metal framework that holds everything together. This needs to be heavy and sturdy because it’s going to be absorbing a lot of force. The mounting surface is where the vise attaches to your workbench, typically using bolts that go through or under the bench.
How Does the Screw Mechanism Actually Create Clamping Force?
This is where things get interesting from a mechanical perspective. The screw mechanism in a bench vise operates on the principle of the inclined plane, one of the simple machines that humans have relied on for thousands of years.
Here’s how it works in practical terms: the threaded screw has grooves cut into it in a spiral pattern. These threads engage with corresponding threads inside the vise body or in a nut that’s part of the mechanism. When you turn the handle, the screw rotates. Because of the way the threads are designed, this rotational motion gets converted into linear motion—the screw moves forward or backward. This forward motion is what pushes the movable jaw toward the fixed jaw.
The key to understanding the power of this system is the mechanical advantage it provides. The longer your handle is, and the tighter the thread pitch (meaning the steeper the spiral), the more force you can generate with minimal effort. It’s the same principle that makes a crowbar so effective at moving heavy objects. You’re not applying tremendous force yourself; instead, you’re using the geometry of the mechanism to multiply your input force.
This is why a bench vise can hold something so incredibly tight. A person of average strength, turning the handle with reasonable effort, can generate hundreds of pounds of clamping force. That’s the mechanical advantage of the screw mechanism at work.
The Role of Thread Pitch in Clamping Power
The thread pitch—the distance between each thread on the screw—plays a crucial role in how the vise performs. A coarser pitch (threads further apart) means fewer turns of the handle to open and close the vise, but each turn produces less clamping force. A finer pitch (threads closer together) requires more handle turns but generates greater clamping force.
Most bench vises are designed with a balance between these factors. They have a pitch that allows reasonable speeds of operation without requiring an excessive number of turns, while still generating adequate clamping force for typical workshop tasks.
Types of Bench Vises: Choosing the Right One for Your Work
Not all bench vises are created equal. Depending on what kind of work you do, you might need different styles and configurations. Let’s explore the main types you’ll encounter.
The Traditional Parallel Jaw Vise
This is the most common type you’ll see in workshops. It’s called a “parallel jaw” vise because the jaws remain parallel to each other throughout their entire range of motion. This means whatever you clamp in it stays aligned and doesn’t tilt or shift as you tighten the clamps.
Parallel jaw vises are excellent for general metalworking, woodworking, and general repair work. They can handle all sorts of shapes and sizes, and they’re relatively simple to use. The jaws are usually replaceable, which is great because over time they’ll develop marks and damage from holding various objects.
The Woodworking or Quick-Release Vise
These vises are designed with speed in mind. They feature a quick-release mechanism that lets you open the movable jaw quickly without having to turn the handle multiple times. You flip a lever or twist a component, and the jaw springs open. Then you place your workpiece and tighten up using the handle.
Woodworkers love these because they spend a lot of time clamping and unclamping different pieces. The speed advantage adds up over a long day of work. However, they’re typically not as powerful as traditional vises, so they’re better suited for holding lighter materials or materials that don’t require extreme clamping force.
The Swivel Base Vise
Some bench vises are mounted on a base that can rotate. This allows you to rotate the entire vise to different angles without having to physically move your workbench or yourself. This is incredibly useful when you need to access your workpiece from different angles. You can position it exactly as you need it for the current task, then swivel it for the next task.
The Pipe Vise
These specialized vises are designed specifically for holding cylindrical objects like pipes and round stock. They have curved jaws that grip all the way around the circumference, distributing pressure evenly and preventing damage to the round surface.
The Physics Behind the Grip: Why Your Workpiece Won’t Slip
You might wonder why a bench vise grip is so effective. Even if something seems smooth, the clamping action is powerful enough to hold it securely. There are a few reasons for this.
First, there’s the sheer force involved. As we discussed, that mechanical advantage of the screw system creates tremendous clamping pressure. When you’re applying hundreds of pounds of force, even smooth surfaces don’t have anywhere to go.
Second, there’s friction. Friction is the resistance that occurs when two surfaces slide against each other. Even though metal surfaces might look smooth to the naked eye, they’re actually microscopically rough. When you press two surfaces together with enough force, those tiny imperfections lock together, creating resistance to any movement.
Third, the vise jaws usually have a textured or ridged surface. Many vises have parallel grooves etched into the clamping surfaces. These grooves create extra mechanical grip and help prevent workpieces from slipping. It’s similar to how a tire tread helps a car grip the road—the pattern increases friction and prevents slipping.
Setting Up Your Bench Vise Properly
Just having a vise isn’t enough. How you set it up and use it can make a huge difference in your results and safety.
Proper Mounting and Positioning
Your bench vise needs to be mounted securely to your workbench. Most come with mounting bolts that pass through the vise base and into the underside of the bench. These bolts need to be tight enough that the vise doesn’t wobble or shift when you’re working with it.
Position your vise at a comfortable height. You don’t want to be hunching over or reaching up too high to work on pieces in it. The center of the jaw opening should be roughly at your elbow height when your arms are hanging naturally at your sides. This ergonomic positioning will reduce fatigue and give you better control.
Most people position their vise at one corner of the bench, leaving the center and most of the bench surface clear for working. However, some workshops feature multiple vises positioned around the bench, allowing for different tasks to be set up simultaneously.
Jaw Covers and Protection
Many bench vises come with removable jaw covers or you can purchase them separately. These are usually made of softer materials like copper, aluminum, or plastic. When you’re clamping workpieces that are easily damaged—like finished wood, polished metal, or delicate items—you slip these covers over the vise jaws.
The covers absorb the clamping force and distribute it over a wider area, preventing the hard steel jaws from marring or denting your workpiece. It’s a simple addition that can save your projects from unwanted damage.
Proper Technique: Getting the Most From Your Vise
Using a bench vise correctly is about more than just knowing how it works mechanically. It’s about understanding the best practices that will keep you safe and give you the best results.
Clamping Your Workpiece Securely
Always position your workpiece so that the area you’ll be working on is accessible and clearly visible. If you’re filing something, you want the flat surface you’re filing to be facing you and not buried in the vise. If you’re drilling, you want to be able to see the point where the drill will enter.
Tighten the vise firmly but don’t overtighten. You want the piece held securely so it won’t move, but you don’t need to turn the handle until your face turns red. Many beginners over-tighten vises, which can:
- Damage your workpiece by denting or deforming it
- Damage the vise jaws by forcing them out of alignment
- Make it unnecessarily difficult to open the vise later
- Potentially bend the vise structure itself
A good rule of thumb is to tighten until you feel resistance, then give the handle one more firm turn. Your workpiece should be immobilized, but you shouldn’t be exerting maximum effort.
Protecting Your Hands and Maintaining Safety
Always be aware of where your hands are in relation to the moving parts of the vise. The handle can move quickly when you’re closing or opening the vise, and if your fingers are in the way, you could get pinched. It sounds obvious, but in the flow of work, people sometimes get careless.
Similarly, keep an eye on the movable jaw. When you’re opening the vise and your workpiece becomes free, it could fall or shift unexpectedly. Be ready to catch it or at least get your hands and feet out of the way.
If you’re using the vise for heavy work—like driving chisels with a hammer or using a lot of force with a file—think about where flying chips or debris might go. Consider wearing safety glasses to protect your eyes.
Maintenance: Keeping Your Vise in Top Condition
A bench vise is a tool that should last for decades with proper care. Here’s how to keep yours in excellent working condition.
Cleaning and Lubrication
Periodically remove any accumulated dirt, metal shavings, or debris from the vise. Use a brush or compressed air to clean out the areas where the screw threads are. If debris gets packed into the threads, it can cause the vise to bind or operate roughly.
The screw mechanism benefits from occasional light lubrication. A thin coating of machine oil applied to the threaded screw and where it engages with the body will help it operate smoothly and prevent rust. Don’t over-lubricate—you just need a thin film. Too much oil will attract dust and dirt.
Checking for Alignment and Wear
Over time, the vise jaws might develop wear patterns or become slightly misaligned. You can check this by closing the vise without any workpiece and seeing if the jaws come together evenly across their entire surface. If one end touches before the other, the vise might be bent.
As mentioned earlier, many vises have replaceable jaw inserts. If the jaws are becoming too worn or damaged, replacing just these inserts is often more economical than replacing the entire vise.
The Handle and Quick-Release Mechanisms
If your vise has a quick-release lever or mechanism, make sure it operates smoothly. If it sticks or becomes difficult to move, it might need cleaning and light lubrication. The handle itself should be checked for cracks or damage. A cracked handle could fail when you’re applying pressure, so replace it if needed.
Common Mistakes People Make With Bench Vises
Learning from others’ mistakes can help you use your vise more effectively and avoid frustration.
One common mistake is using the vise as a hammer rest or general support. Just because it’s clamped to your bench doesn’t mean you should bang on it with hammers or allow heavy impacts. That vise is a precision tool designed to hold things steady, not to withstand abuse. There are appropriate surfaces for striking—like an anvil for metalwork or a proper striking block for woodwork.
Another mistake is clamping delicate items without protection. We touched on this earlier, but it’s worth emphasizing. Those hard steel jaws can leave permanent marks on wood, finished metals, or soft materials. Always use jaw covers when protecting your work matters.
People sometimes forget to remove tools or workpieces from the vise and then try to move the entire bench. Not only is this potentially damaging to whatever you’ve clamped, but it can be dangerous. Always clear your vise and open the jaw fully before moving or rearranging your workspace.
Advanced Applications: Beyond Basic Clamping
Once you understand the basics, there are some clever ways to use a bench vise beyond simple holding.
You can use it to bend metal by positioning the metal carefully in the jaws and then applying clamping force. The vise acts as a fulcrum, and the leverage of the jaws helps bend the material. This is especially useful for softer metals like copper or aluminum.
Some people use a vise to straighten bent items. If something is slightly bent, clamping it firmly in a properly positioned vise can often restore it to shape. The key is positioning it correctly