How a Bench Drill Press Works
A bench drill press works by using a motorized spindle to lower a rotating drill bit into a workpiece. This setup allows for precise drilling and greater control than a handheld drill. It’s a powerhouse for making accurate holes in wood, metal, and plastic.
You might wonder if it’s complicated. It’s actually quite straightforward once you understand the main parts. Think of it as a stationary drill with a bit more muscle and accuracy. This tool is essential for any serious DIYer or professional wanting clean, consistent results.
- A drill press uses a motor to spin a drill bit.
- A handle lowers the spinning bit precisely.
- A table holds your material firmly in place.
- It offers more power and accuracy than hand drills.
- Great for making consistent holes in various materials.
Ready to understand how this fantastic machine makes creating perfect holes so much easier? Let’s walk through exactly how a bench drill press works, piece by piece.
Understanding How a Drill Press Operates
You’re curious about the magic behind that bench drill press. It’s simpler than you might think! A drill press takes the basic idea of a hand drill and puts it on a sturdy stand. This allows for much more precision and power. Let’s break down its core components and how they work together to create perfect holes every single time.
The Main Components and Their Roles
Think of your drill press as a well-orchestrated machine. Each part plays a vital role. Understanding these pieces will make operating your drill press feel much more natural. It’s like learning the instruments in an orchestra before enjoying the symphony.
The Motor: The Driving Force
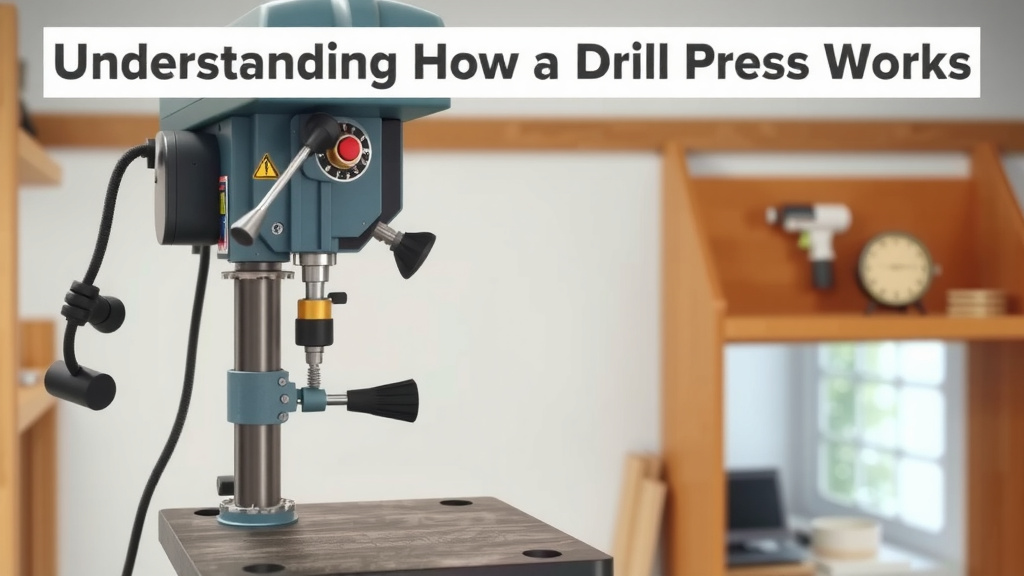
At its heart is the electric motor. This motor provides the rotational force. It spins the drill bit at a specific speed. Most bench drill presses have a motor around 1/2 to 3/4 horsepower. This might not sound like a lot, but it’s ample for most DIY tasks. The motor is usually mounted at the back or top of the machine. It connects to the spindle assembly via a belt and pulley system. This belt system is key for adjusting speed.
The Spindle and Chuck: Gripping the Bit
The spindle is the rotating shaft that the drill bit attaches to. The chuck is the part that holds the drill bit. You’ll find it at the very bottom of the spindle. Most chucks are keyless, meaning you can tighten them by hand. Older or heavier-duty models might use a chuck key. You’ll insert the drill bit into the chuck and tighten it securely. The spindle itself moves up and down to plunge the bit into your material. This controlled movement is crucial for accuracy.
The Handle Assembly: Your Control Lever
This is how you control the spindle’s movement. The handle assembly, often called the quill handle or feed lever, has several arms. You pull down on these arms to lower the spindle and the attached drill bit. Releasing the handles allows a spring to retract the spindle back up. This provides a smooth, consistent feed rate. It’s a much more controlled motion than you can get with your hand alone. You can apply steady pressure, which is vital for clean cuts.
The Table: Your Sturdy Platform
The table is where you place your workpiece. It’s designed to be stable and adjustable. You can raise or lower the table to accommodate different material thicknesses. You can also often tilt the table for angled holes. Many tables have slots or T-slots. These allow you to attach clamps or jigs. Clamping your material is essential for safety and accuracy. A wobbling workpiece can lead to a ruined project and a dangerous situation.
Adjusting the Table Height and Angle
You’ll typically find a crank or a lever to move the table up and down. Some models have a separate mechanism for tilting. Always ensure the table is securely locked in place before drilling. A loose table is a recipe for disaster. Research and found that proper workpiece support reduces tear-out and improves hole quality (Woodworking Magazine).
The Column and Base: Stability is Key
The column is the vertical support that connects the head (motor, spindle, handle) to the base. The base provides a solid foundation for the entire machine. It’s often heavy to prevent tipping. Together, the column and base ensure the drill press remains stable during operation. This stability is what allows for those precise, wobble-free holes. A sturdy construction minimizes vibrations, which is good for your work and your hearing.
Putting It All Together: The Drilling Process
Now that you know the players, let’s see them in action. It’s a simple sequence that results in professional-looking holes.
Setting Up for the Job
First, you select the right drill bit for your material and hole size. You then insert it firmly into the chuck and tighten it down. Next, you place your workpiece on the table. It’s crucial to clamp your material securely. This prevents it from spinning with the drill bit. You then adjust the table height so the drill bit just clears the surface when fully retracted. Finally, you align the drill bit with your mark.
The Controlled Descent
Once everything is set, you turn on the motor. The drill bit begins to spin. You then pull down on the handle assembly. This slowly lowers the rotating bit into the material. The spring-loaded mechanism ensures a smooth, consistent feed. You apply just enough pressure to let the bit cut without bogging down the motor. You should see wood chips or metal shavings curling away cleanly. We found that a steady feed rate leads to the cleanest holes.
The Return Stroke and Cleanup
When you’ve reached the desired depth, you release the handles. The spring pulls the spindle back up, retracting the bit. You then turn off the motor. You can then unclamp your workpiece and remove it. A quick sweep of the table clears away the debris. You’re left with a perfectly round, precisely placed hole. Many experts suggest wearing safety glasses throughout this entire process (Occupational Safety and Health Administration).
Speed Adjustment: Matching Bit to Material
Not all drilling is created equal. Different materials and drill bit sizes require different rotational speeds. Your drill press allows you to adjust this. Most bench drill presses use a belt-and-pulley system for speed control. You’ll need to open the motor housing cover. Then, you move the drive belts to different sized pulleys. Smaller pulleys on the motor and larger ones on the spindle result in slower speeds. Larger pulleys on the motor and smaller ones on the spindle create faster speeds.
Why is this important? Drilling too fast can overheat and dull your drill bit. It can also burn your material, especially wood. Drilling too slow can lead to inefficient cutting. It can also cause excessive wear on your drill bit. We found that consult your drill bit manufacturer’s recommendations for optimal speeds.
| Drill Bit Diameter | Wood Speed (RPM) | Metal Speed (RPM) |
|---|---|---|
| 1/8″ – 1/4″ | 1200 – 2500 | 600 – 1200 |
| 1/4″ – 1/2″ | 600 – 1200 | 300 – 600 |
| 1/2″ – 1″ | 300 – 600 | 150 – 300 |
Remember, these are general guidelines. Always err on the side of caution. It’s better to drill a little slower than too fast.
Safety First: Essential Precautions
While drill presses are more controlled than handheld drills, safety is still paramount. Always follow these simple steps:
- Wear safety glasses at all times.
- Never wear loose clothing or jewelry that could get caught.
- Always clamp your workpiece securely to the table.
- Keep your hands well away from the spinning drill bit.
- Ensure the drill press is stable and properly grounded.
- Turn off the drill press before making any adjustments.
By understanding how each part functions and following safe practices, you’ll be creating accurate, professional holes in no time!
Conclusion
You’ve now walked through the inner workings of a bench drill press, from its powerful motor to its stable base. You understand how each component, like the spindle, chuck, and handle assembly, works in harmony. This knowledge allows you to appreciate the precision and control this tool offers over a handheld drill. Remember that adjusting speed and always prioritizing safety are key to getting the best results. With this understanding, you’re ready to take on your projects with confidence and create those perfect holes you’ve been aiming for.
Frequently Asked Questions
Can I use any drill bit in a bench drill press?
You can use most drill bits designed for your material (wood, metal, plastic). Always ensure the bit fits securely in the chuck and is the correct type and size for the job. Using the wrong bit can damage your workpiece or the drill itself.
How do I know what speed to set my drill press to?
Speed depends on the drill bit size and the material you’re working with. Generally, larger bits and softer materials require slower speeds, while smaller bits and harder materials need faster speeds. The table provided in the article offers good starting points.
What is the difference between a keyless chuck and a keyed chuck?
A keyless chuck tightens and loosens by hand, making bit changes quick and easy. A keyed chuck requires a special tool called a chuck key to tighten and loosen the bit. Keyed chucks are often found on more heavy-duty machines and can offer a more secure grip.
Why does my drill press have a belt and pulley system for speed?
This system allows you to manually change the rotational speed of the spindle. By moving the belts to different sized pulleys, you can increase or decrease the RPMs to match the needs of different drilling tasks. This is essential for efficient and safe drilling.
Is a bench drill press necessary if I already have a handheld drill?
While a handheld drill is versatile, a bench drill press offers superior accuracy and control for repetitive tasks or when perfectly straight holes are critical. It provides a stable platform and consistent downward pressure that’s difficult to achieve by hand, leading to cleaner, more professional results.