How a Bench Plane Works
A bench plane works by using a sharp blade to shave thin layers of wood. You adjust how much wood it removes by changing the blade’s angle and depth. This process helps you flatten, smooth, and shape your lumber with impressive precision. Think of it as a handheld, highly controlled sanding tool.
Understanding how a bench plane functions is key to achieving beautifully finished woodworking projects. It’s a fundamental tool for any woodworker aiming for accuracy. Many experts say that mastering this tool separates good work from great work. You’ll find it useful for everything from rough flattening to fine shaving.
- A bench plane shaves wood with a sharp blade.
- Adjusting the blade’s depth and angle controls the cut.
- It’s used for flattening, smoothing, and shaping wood.
- Mastering it leads to higher quality woodworking.
Let’s walk through exactly how this classic tool achieves its results, step by step. We’ll break down the main parts and how they work together.
Understanding the Mechanics of a Bench Plane
You’ve got your wood, you’ve got your plane, but how do they actually get along? It’s all about physics and sharp metal. A bench plane works by having a precisely set blade, called a cutting iron or plane iron, bite into the wood. This iron is held at an angle by a cap iron, which supports it and helps to curl the wood shaving away cleanly.
The Core Components and Their Roles
Let’s break down the anatomy of a bench plane. Understanding these parts will help you appreciate how they work in harmony. Think of them as a team, each with a vital job to do to turn rough lumber into smooth surfaces. You’ll find the main components are the body, the blade, and the adjustment mechanisms.
The Plane Body (Sole and Frame)
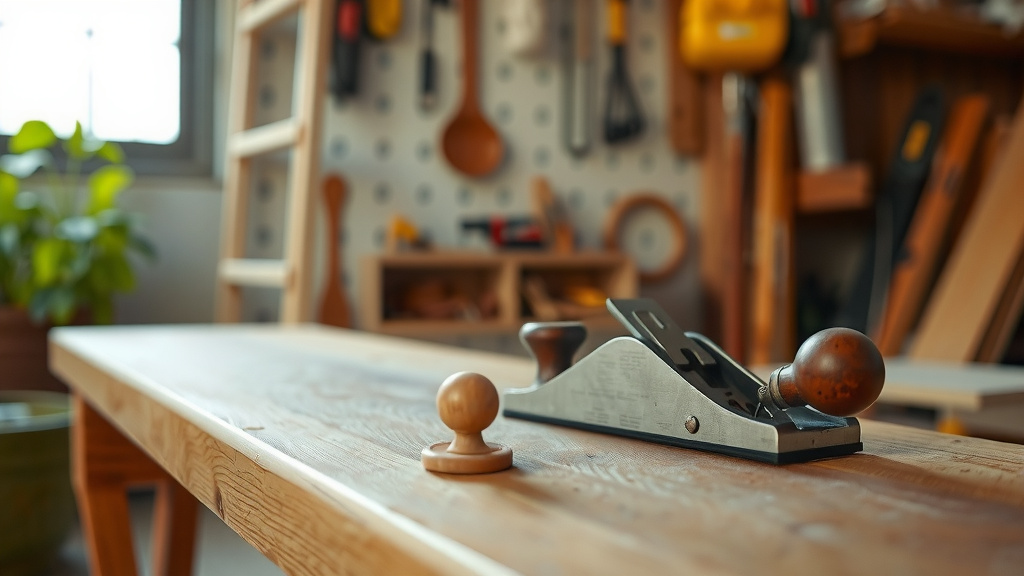
The main part you hold is called the body. The bottom surface of this body is called the sole. This sole is what glides over the wood. It needs to be perfectly flat to ensure the plane cuts evenly. If the sole isn’t flat, you’ll end up with high spots and low spots, which is the opposite of what you want! The frame of the plane provides the structure to hold everything together and gives you a comfortable grip.
The Cutting Iron and Cap Iron
At the heart of the plane is the cutting iron. This is the sharp blade that does all the shaving. It’s typically made of hardened steel for durability and to hold a keen edge. Just behind it, you’ll find the cap iron. This piece is often overlooked, but it’s super important. Its job is to stiffen the cutting iron and to break the wood shaving as it’s being cut. This prevents “tear-out,” which is when chunks of wood get ripped out instead of cleanly shaved.
The Adjustment Mechanisms
How do you control how much wood the plane removes? That’s where the adjustment knobs come in. Most bench planes have two main adjustments. There’s a lever that moves the cutting iron up or down, controlling the depth of cut. Then there’s a lateral adjustment lever that lets you move the blade left or right. This ensures the blade is perfectly square to the sole, which is critical for smooth, even shaving. You’ll fine-tune these to get just the right shaving thickness.
The Precision of the Cut: How Shavings Are Made
The magic of a bench plane lies in its ability to remove wood in controlled, thin layers. It’s not about sanding away material; it’s about slicing it. This slicing action is what gives you that beautiful, smooth finish that sandpaper often can’t match. You’re essentially peeling the wood like an apple, but with much more control.
Setting the Depth of Cut
The depth of cut is perhaps the most important setting. You adjust this using the depth adjustment mechanism. A shallow cut means you’re taking off a very thin shaving, perfect for smoothing and final finishing. A deeper cut removes more material, useful for flattening a warped board or dimensioning rough lumber. Many woodworkers found that a good starting point for a final smoothing pass is a shaving so thin you can almost see through it.
Ensuring a Square Blade
A plane that’s not set up correctly can cause a lot of frustration. If the cutting iron isn’t perfectly square to the sole, you’ll get uneven cuts. One side of the shaving will be thicker than the other. This is why the lateral adjustment lever is so important. You want the cutting edge of the iron to be parallel to the sole of the plane. It’s a common troubleshooting step for many beginners to check if their blade is square.
The Role of the Cap Iron in Action
Remember that cap iron we talked about? Let’s look at it in action. As the cutting iron slices into the wood, the cap iron is positioned just behind the cutting edge. It intercepts the wood shaving. This forces the shaving to bend upwards and break. This controlled breakage is key. It prevents long, ragged splinters from tearing out of the wood. Research shows that the angle of the cap iron can also affect how cleanly it breaks the shavings, with steeper angles often being better for figured or difficult woods (Woodworking Journal).
Achieving Flatness and Smoothness: The Practical Application
So, you understand the parts and the mechanics. Now, how does this translate to real-world woodworking? A bench plane is your go-to tool for achieving perfectly flat surfaces and a silky-smooth finish. It’s about more than just removing material; it’s about shaping your wood with precision.
Flattening Wood Surfaces
When you get a piece of lumber, it’s rarely perfectly flat. There might be high spots or slight cupping. You use a bench plane to systematically remove these high spots. You’ll make long, sweeping strokes across the surface. With each pass, you’re taking off a thin layer of wood, gradually bringing the entire surface down to a uniform flatness. It’s a methodical process that requires patience.
Smoothing and Preparing for Finish
After flattening, the surface might still have some faint plane marks. For a truly smooth finish, you’ll reduce the depth of cut to its absolute minimum. You take very light shavings. This process effectively “polishes” the wood surface. Many experienced woodworkers will tell you that a well-planed surface needs very little sanding, if any. It feels incredibly smooth to the touch. You’re essentially creating a finish with the tool itself.
Shaping and Dimensioning Lumber
Bench planes aren’t just for finishing. They can also be used to dimension lumber. If a board is slightly too wide, you can use a plane to trim it down. This is done by taking consistent shavings along the edge. You can also use them to chamfer edges or create slight bevels. It’s a versatile tool for refining the size and shape of your wood.
Essential Bench Plane Operations Checklist
To ensure you’re getting the most out of your bench plane, here’s a quick checklist of what to focus on:
- Ensure your plane’s sole is flat.
- Sharpen your cutting iron to a razor’s edge.
- Check that the cutting iron is square to the sole.
- Set a shallow depth for fine finishing passes.
- Use long, consistent strokes for even results.
- Listen to the sound of the shaving – it tells you a lot!
Conclusion
You’ve now seen how a bench plane transforms rough wood into a smooth, flat surface. It’s a tool that relies on sharp steel, precise adjustments, and your own steady hand. By understanding its components – the sole, the cutting iron, and the adjustment mechanisms – you gain control over your woodworking. Remember, a sharp blade and square setup are your best friends. Practice these principles, and you’ll achieve woodworking results you can be proud of. Your next step? Grab your plane, find some scrap wood, and start practicing those controlled shaving techniques!
Frequently Asked Questions
How do I know if my plane blade is sharp enough?
You’ll know your blade is sharp when it produces very thin, almost transparent shavings without much effort. If you feel resistance or hear a “tearing” sound, your blade likely needs sharpening. Research suggests a properly sharpened plane iron feels like it glides through the wood effortlessly.
What’s the difference between a bench plane and a block plane?
A bench plane is typically larger and held with two hands, designed for flattening and smoothing larger surfaces. A block plane is smaller, held with one hand, and often used for chamfering edges, trimming end grain, or for tasks requiring more control in tight spaces.
Why do I get fuzzy or torn-out wood instead of clean shavings?
Tear-out usually means your cutting iron isn’t sharp enough, or the cap iron isn’t set correctly to support the iron. Wood grain direction also plays a big role; you want to plane “downhill” with the grain. If you can’t avoid it, try reducing your cut depth or using a plane with a higher blade angle.
How often should I sharpen my plane blade?
This depends on how much you use your plane and the type of wood you’re working with. For general woodworking, many find sharpening after every hour or two of active planing is a good practice. For fine finishing, you might need to sharpen more frequently.
Can I use a bench plane on plywood or MDF?
Bench planes are generally not recommended for manufactured wood products like plywood or MDF. These materials contain glues and wood fibers that are too abrasive and inconsistent for a fine-cutting bench plane. They can quickly dull your blade and may not produce a clean cut.