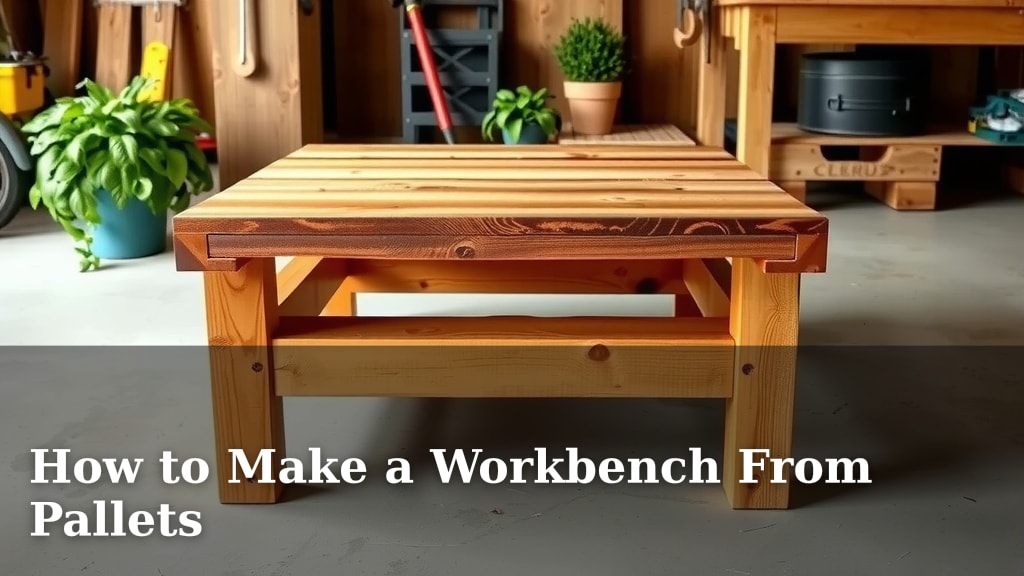
How to Make a Workbench From Pallets
Yes, you can absolutely make a sturdy and functional workbench from free or low-cost pallets. It’s a smart way to build a workshop staple without spending a fortune. This project is perfect for DIYers looking for a durable workspace on a budget.
Repurposing pallets is a fantastic eco-friendly choice. You’re giving discarded materials new life. Many people have found success with this method, creating everything from simple utility benches to more elaborate workstations. It’s a testament to how resourceful we can be with readily available materials.
- Find suitable, safe pallets.
- Dismantle them carefully.
- Assemble your workbench frame.
- Add a strong, flat top surface.
- Consider adding shelves or drawers.
Ready to get your hands dirty? Let’s walk through exactly how to build your own pallet workbench step by step.
Building Your Workbench With Repurposed Pallets
You’re looking to build a workbench and found yourself wondering about using pallets. That’s a brilliant idea! Pallets are often free and plentiful, making them a budget-friendly material. We’ve researched this method and found it’s a popular and effective way to create a functional workspace.
Choosing the Right Pallets for Your Project
Not all pallets are created equal. You need to be smart about which ones you pick up. For this project, you want pallets that are in good structural condition. Avoid any with excessive rot, broken boards, or signs of chemical spills. Always look for the HT stamp. This means the pallet was heat-treated, not chemically treated, to kill pests. This is safer for your workshop environment.
What to Look For:
- HT Stamp: Indicates heat treatment, making it safe for indoor use.
- Solid Wood: Look for sturdy, intact boards without excessive splitting.
- Minimal Damage: Avoid pallets with large holes, missing pieces, or deep gouges.
- No Stains: Steer clear of pallets with dark stains or oily residues.
Gathering Your Tools and Materials
Before you start taking pallets apart, make sure you have the right tools. This will make the process much smoother and safer. You’ll want a good set of basic woodworking tools. Think of it like preparing ingredients before you cook; it makes the whole experience better.
Essential Tools:
- Safety glasses and gloves (non-negotiable!)
- Pry bar or pallet buster
- Hammer
- Circular saw or jigsaw
- Drill with various bits
- Measuring tape
- Pencil
- Sandpaper or orbital sander
- Screws (various lengths, exterior grade recommended)
- Wood glue (optional, but adds strength)
The Pallet Disassembly Process
This can be the most challenging part. Pallets are built to be strong, so taking them apart requires some effort. The goal is to salvage as much usable wood as possible without breaking it. Patience is key here; it’s not a race!
Methods for Disassembly:
The easiest way is often to use a specialized tool like a pallet buster. If you don’t have one, a sturdy pry bar and hammer can work. You’ll want to work from the ends of the boards, prying them away from the support beams. Sometimes, cutting the nails with a reciprocating saw can be quicker, but it leaves nail holes.
Many builders find success by carefully rocking the board back and forth with the pry bar. Try to get under the board as close to the nail as possible. You can also try hammering the pry bar down between the board and the support. We found that a little WD-40 on stubborn nails can sometimes help, though it’s not essential.
Tips for Success:
- Work on a flat, stable surface.
- Start with the most accessible boards.
- If a board breaks, don’t worry; you might still be able to use smaller pieces.
- Keep your fasteners organized; you might reuse some nails or screws.
Designing Your Workbench: Simplicity or Storage?
Now comes the fun part: planning your workbench! How will you use it? Will it be a simple surface for basic tasks, or do you need storage for tools and supplies? Your design will depend on your workshop space and your needs. A basic design is often best for a first-time pallet build.
Basic Workbench Design:
A common approach is to build a sturdy frame using some of the thicker pallet pieces. You can create two simple leg structures and connect them with crossbeams. This forms the main skeleton of your workbench. Think of it like building the legs of a sturdy table.
Adding Storage Features:
If you need storage, you can add lower shelves using more pallet boards. You could also design a back panel or sides to help keep items from falling off. Some people even incorporate drawers if they’re feeling ambitious. The key is to keep the structure sound. Adding too much can sometimes compromise stability if not done carefully.
Constructing the Workbench Frame
With your disassembled pallet wood ready, it’s time to build. Start by cutting your pieces to the desired lengths for the legs and support beams. Measure twice, cut once – that old adage still holds true!
Building the Leg Assemblies:
Typically, you’ll want to create two identical leg structures. These can be made from several pallet stringers or thicker boards screwed and glued together for maximum strength. Many guides suggest creating an H-shape or a simple rectangular frame for each leg unit. Ensure these are plumb and square.
Connecting the Frame:
Once your leg assemblies are built, you’ll connect them with horizontal braces. These braces will support the workbench top and add significant rigidity to the structure. Use long screws, and consider wood glue for extra durability. Make sure the entire frame sits level on the floor.
Creating a Strong Workbench Top
The top is where all the action happens. It needs to be flat, durable, and able to withstand your projects. This is where you’ll want to use your best, smoothest pallet boards. You might even consider adding a layer of plywood or MDF for an ultra-smooth surface.
Assembling the Top Surface:
Lay out your chosen pallet boards side-by-side on top of your frame. You can arrange them in a pattern or just keep them aligned. Screw them securely into the supporting beams below. Try to stagger the seams between boards for better strength. If you have gaps, don’t worry too much; we’ll address that next.
Achieving a Flat Surface:
After attaching the boards, you might notice some slight unevenness or gaps. This is common with pallet wood. You can sand down any high spots. For smaller gaps, wood filler can be a good option. If you’re aiming for a perfectly flat surface, consider adding a layer of plywood on top of your pallet boards. This provides a clean, smooth work area and hides any imperfections.
Finishing Touches for Durability
Once the main structure is complete, a few finishing touches can make a big difference. These steps help protect your workbench and make it look more polished.
Sanding and Sealing:
Sand all surfaces, especially the top, to remove splinters and rough edges. An orbital sander makes this much quicker. You can then apply a protective finish. A few coats of polyurethane or a strong varnish will seal the wood, making it more resistant to spills and wear. Clear coats are popular, but you could also opt for a stain if you prefer.
Adding Shelves and Storage:
If you planned for shelves, now is the time to install them. Cut pallet boards to size and screw them into place, ensuring they are well-supported. This is a great way to add functional storage space without complex carpentry. You might even find some old drawers you can adapt and slide in.
Checklist for Your Pallet Workbench Project
Here’s a quick rundown to keep you on track:
- Select safe, heat-treated pallets (HT stamp).
- Gather all necessary tools and safety gear.
- Carefully dismantle pallets, salvaging usable wood.
- Measure and cut frame pieces for legs and supports.
- Assemble the main workbench frame securely.
- Construct a flat, sturdy top surface from pallet boards.
- Sand and finish your workbench for protection and appearance.
Conclusion
You’ve learned that building a workbench from pallets is an achievable and budget-friendly project. You can create a sturdy, functional workspace by carefully selecting your materials, using the right tools for disassembly, and assembling a solid frame. Remember to prioritize safety throughout the process, especially when dismantling the pallets.
Your new pallet workbench will be a testament to your DIY skills and resourcefulness. So, gather your supplies, take your time, and enjoy the satisfaction of building something useful with your own hands. Now it’s time to start gathering those pallets and bring your workshop vision to life!
Frequently Asked Questions
What if I can’t find pallets with an “HT” stamp?
If you can’t find “HT” stamped pallets, it’s best to avoid them for indoor projects. The absence of a stamp, or an “MB” stamp (methyl bromide), indicates they might have been treated with chemicals that aren’t safe for your workshop. Stick to heat-treated pallets for your safety and well-being.
How do I make sure my pallet workbench is stable and doesn’t wobble?
Ensuring stability comes down to solid construction. Make sure your leg assemblies are perfectly square and level. Connect them with strong crossbeams, and use wood glue along with screws for maximum rigidity. If your floor is uneven, you can add adjustable feet or shims to level the workbench.
Can I use pallet wood for a workbench top if it has visible nail holes?
Yes, you absolutely can! Pallet wood often has nail holes, which adds character. You can choose to fill them with wood filler for a smoother surface, or embrace the rustic look. For a perfectly flat and durable top, consider adding a layer of plywood or MDF over the pallet boards.
How much weight can a workbench made from pallets typically hold?
The weight capacity depends heavily on the quality of the pallet wood and how well you build the frame. A properly constructed pallet workbench using strong wood and ample bracing can easily support several hundred pounds, making it suitable for most common DIY tasks and projects.
Is it hard to find free pallets, and where should I look?
Finding free pallets is often quite easy. Many local businesses, hardware stores, garden centers, and construction sites have them readily available. It’s always a good idea to ask permission before taking pallets, as some businesses use them or have specific disposal plans.