
How to Make a Woodworking Bench
Making your own woodworking bench is absolutely achievable for most DIYers. You’ll need some basic tools and materials to build a sturdy workbench that suits your space and projects. This guide will show you how.
A well-built bench is the heart of any workshop. It provides a stable surface for cutting, assembling, and finishing your projects. Many common designs offer great utility without requiring advanced skills, making them a fantastic first project.
- Choose a simple, sturdy design.
- Gather common woodworking tools.
- Measure and cut your lumber accurately.
- Assemble the frame and top.
- Add optional features like vises.
Let’s walk through exactly how to build a woodworking bench, step by step.
Building Your Own Sturdy Woodworking Bench
You’re ready to build a woodworking bench. That’s fantastic! A solid workbench is more than just a piece of furniture. It’s the foundation for countless projects. We’ll guide you through creating one that’s both strong and functional. Let’s get started on this rewarding DIY project.
Choosing the Right Workbench Design
The best design for you depends on your workshop space and the types of projects you tackle. Many popular designs are simple, robust, and achievable for beginners. You don’t need a complex plan to get a great result.
Simple and Strong: The Roubo-Style Influence
The classic Roubo workbench design is a favorite among woodworkers for its strength. It features a thick, heavy top and robust legs. You can adapt this style to fit your needs. Research shows these benches can last for generations (Fine Woodworking Magazine).
Consider Your Space and Needs
Think about where your bench will live. Will it be in a small garage or a dedicated workshop? Measure your available space carefully. Also, consider the typical size of your projects. This helps determine the ideal bench dimensions.
Essential Materials and Tools
Gathering your materials is your next step. You’ll need lumber, screws, and possibly some wood glue. Most designs use common dimensional lumber, like 2x4s and 4x4s. Don’t forget safety gear, of course.
Lumber Checklist
- Dimensional lumber (e.g., 2x4s, 2x6s, 4x4s)
- Plywood or MDF for the workbench top
- Wood screws (various lengths)
- Wood glue
Tool Must-Haves
- Measuring tape
- Pencil
- Circular saw or miter saw
- Drill/driver with assorted bits
- Square
- Clamps
- Safety glasses and hearing protection
Cutting Your Lumber with Precision
Accuracy here is key to a stable bench. Measure twice, cut once is more than just a saying; it’s a blueprint for success. Even small errors can compound and lead to a wobbly bench.
Prepare Your Cuts
Lay out your lumber and mark your cut lines clearly. Use a sharp pencil for precise lines. A good quality square will help you get perfectly perpendicular marks.
Making the Cuts
If you’re using a circular saw, make sure it’s set to the correct depth. A miter saw is excellent for precise crosscuts. Always follow safety instructions for your tools. Many guides recommend using a cutting jig for repeated accurate cuts (Wood Magazine).
Leg Assembly Cuts
You’ll need to cut the lumber for the legs and the aprons that connect them. Ensure all leg pieces are cut to the exact same length. This is vital for a level workbench.
Top and Shelf Cuts
Cut the pieces for your workbench top. If you’re layering plywood, cut each piece accurately. The shelf, if your design includes one, should also be cut to size.
Assembling the Workbench Frame
Now, let’s bring these pieces together. The frame is the skeleton of your workbench, providing its primary strength.
Building the Leg Assemblies
Start by attaching the aprons to the legs. Use wood glue and screws for a strong bond. Pre-drilling pilot holes can prevent the wood from splitting. Many woodworkers find that a pocket hole jig makes this step much easier and cleaner.
Connecting the Sides
Once you have two completed leg assemblies, connect them with the longer apron pieces. Again, glue and screws are your best friends here. Ensure everything is square as you assemble.
Adding Support and Shelves
If your design includes lower stretchers or a shelf, install them now. These add rigidity to the overall structure. A shelf can provide useful storage space for your tools.
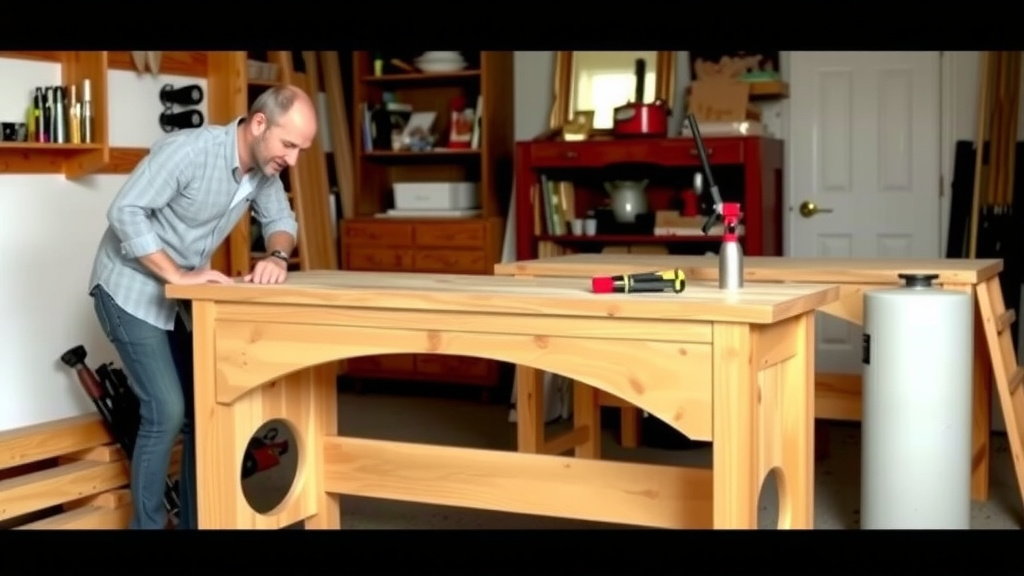
Constructing the Workbench Top
The workbench top is where all the action happens. It needs to be flat, sturdy, and able to withstand heavy use.
Layering for Strength
For a durable top, layering is a common and effective technique. Glue and screw together multiple layers of plywood or MDF. Many professionals recommend a minimum thickness of 1.5 to 3 inches for a solid workbench top (Popular Woodworking Magazine).
Ensuring Flatness
As you attach layers, use plenty of clamps to ensure the surface remains flat. Once the glue dries, you can sand the top smooth. A router with a straight bit can also be used to flatten larger surfaces if needed.
Attaching the Top to the Base
Carefully position the completed top onto your assembled base. Secure it from underneath using screws. Be sure the screws are not too long, so they don’t poke through the top surface. You want a seamless working area.
Adding Practical Features
Your workbench is functional now, but a few additions can make it even better.
Installing a Vise
A vise is an essential tool for holding workpieces securely. There are many types, from face vises to end vises. Choose one that fits your budget and typical tasks. Mounting it securely is important for its effectiveness.
Consider a Bench Dog System
Bench dogs are simple pegs that fit into holes in your workbench top. They work with vises and clamps to provide support and hold workpieces at various angles. Drilling a grid of holes allows for great versatility.
Finishing Touches
You can leave the wood unfinished for a natural look, or apply a protective finish like polyurethane. This will help shield your bench from spills and wear. A well-built bench is a joy to use. You’ve done it!
Conclusion
You’ve successfully learned how to build your own woodworking bench. This project gives you a sturdy, reliable workspace. Remember that careful measuring and accurate cuts are key to a stable result. Assembling the frame and attaching a strong top create the foundation for your projects. Don’t forget to add practical features like vises for added functionality. Now that you have the knowledge, it’s time to get building!
Your next step is to select a design that fits your space and start gathering your materials. You’re well on your way to owning a bench that will serve you for years to come.
Frequently Asked Questions
What are the most important considerations when choosing a workbench design?
You should consider your available workshop space and the typical size of projects you work on. A larger bench takes up more room but offers more surface area. Research suggests that a simpler, robust design is often best for beginners.
How do I ensure my workbench top is perfectly flat?
Using plenty of clamps while gluing and assembling layers of your top is essential for flatness. Once the glue has cured, you can use a router or sander to flatten any minor imperfections. A truly flat surface makes a big difference in your work.
Can I build a woodworking bench with limited tools?
Yes, you can build a functional bench with basic tools like a measuring tape, pencil, saw, drill, and square. While specialized tools can make the process easier, they aren’t strictly necessary for a sturdy build. You’ll find many designs adaptable to fewer tools.
What kind of wood is best for a workbench?
Common, sturdy hardwoods like oak or maple are excellent choices for workbench tops due to their durability. For the frame, less expensive dimensional lumber like pine, fir, or poplar is often sufficient. Many DIYers find success using readily available construction-grade lumber.
How can I make my workbench more stable?
Ensuring all your leg pieces are cut to the exact same length is critical for stability. Connecting the leg assemblies with sturdy aprons and possibly lower stretchers adds rigidity. A heavy, solid top also contributes significantly to a stable workbench.